Gephi – The Marvel Universe

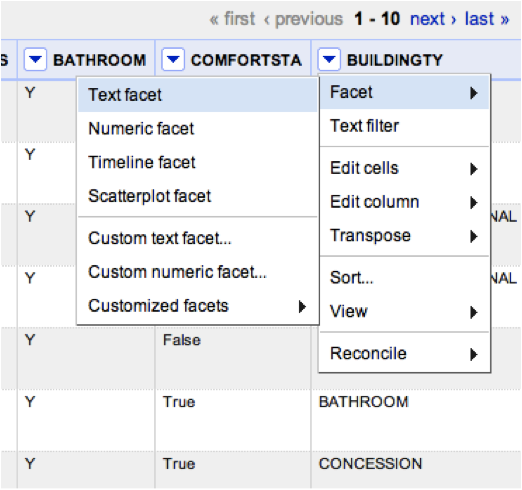
Gephi is free, open source visualization software that allows users to display data in network graphs. I had some prior experience with Gephi visualizations as a viewer, as opposed to user. The technical infrastructure team at the Information Architecture Institute was working with Gephi to create website maps and concept diagrams of the IA Library. I admired the simplicity of the node and edges display and was happy to get hands on training in the tool.

Materials

Gephi is a powerful tool that lets people explore and display relationships and connections. For this project, I selected the Marvel Universe Social Graph from Infochimps:

http://www.infochimps.com/datasets/marvel-universe-social-graph

This dataset constructed by Cesc Rosselló, Ricardo Alberich, and Joe Miro from the University of the Balearic Islands contains Marvel characters and the comic book issues that they appeared in. It is a very large dataset holding 99,662 records.

Method

  1. Format your data.
    Gephi requires a particular data format. Start by creating a spreadsheet with three columns for Source, Target and Type. The Source is the data that will represent the node or circles on the network graph. The Target represents the Edges or connections between nodes. The third column, Type, indicates the direction of the relationship. For this exercise, I entered Undirected for each record.Save your file as a comma-separated value (CSV) file.
  2. Create a new project
    On launch, Gephi will ask if you want to open an existing project or create a new one. Click “New Project.”gephi-new-project
  3. At the top left of the screen, Click the “Data Laboratory” button, then the “Edges” tab, then “Import Spreadsheet.” This will import your data into an Edge Table.gephi-import-spreadsheet
  4. Select a CSV file to import. Click the dropdown menu below “As Table:” and select “Edges table.” Then, click “Next.”
    gephi-general-options
  5. If your dataset is very large, Gephi may ask to increase the memory allocated to the program. You will need to save your file and restart the program for this to take effect.
  6. In the next screen, if your data is numerical, you can set a datatype. Otherwise, leave as “String” and click “Finish.”The resulting Edge table will contain the three columns from your CSV file, Source, Target and Type, plus label and weight.Note on saving projects: It is a good idea to save your visualization frequently. After making major changes to the project, it is helpful to give an updated version number to the saved filename.
  7. Click the Overview button. This is where you can apply a layout, and adjust the color and size of your nodes and edges. At this point your visualization will look like a mass of gray circles.marvel-grey-mass

You can now begin to format the visualization.

  1. Under the Layout panel on the bottom left, select “Force Atlas 2” from the dropdown menu, then click “Run.” The Force Atlas 2 layout is a force-directed graph, which is faster than Force Atlas, having a rough algorithm that renders quickly.gephi-layout-panel
  2. The nodes will begin to separate and give shape to the graph. Lines representing the edges between nodes will begin to appear and stretch.marvel-force-directedThe resulting visualization is called a force-directed graph, because the force of gravity or propulsion between them defines the relationship between two nodes. Isolates get pushed to the outside and will continue to float away to infinity. You can stop it by setting Gravity to a higher level. The . Depending on the number of nodes, rendering the graph could take some time.
  3. Now we will add some color. On the Ranking tab in the top left panel, make sure the Nodes tab is selected and click the color circle. Select “Degree” from the dropdown menu.gephi-ranking-panelTo the right edge of the color bar, you will see a small box for selecting color palettes. Click this box, and then click Default to open a range of color schemes. Select a color scheme that you like or that emphasizes the data appropriately.gephi-color-scheme-panel
  4. To adjust the relative size of the nodes, click the diamond shape on the Ranking tab. You can then select the minimum and maximum size of nodes and limit the range by number.gephi-node-size-panel
  5. The resulting graph may look something like this:marvel-gephi-graphFigure 1 The Marvel Comics UniverseThe Marvel Universe, in this example, is a dense mass of nodes with a several groups loosely connected to the center and a number of unconnected nodes floating toward the edges.A close view of the central nodes reveals groupings of related nodes within the dense structure.marvel-gephi-graph-detail

    Figure 2 Detail of the Marvel Comics Universe

Additional Tools

Gephi has a number of additional tools that allow you to run statistical analyses and filters on the data. Rather than go through steps for using these tools, I highlight a few here.

The Modularity chart shows the distribution of nodes by number of connections. The sample file indicates a modularity of 0.683 and 56 distinct communities of Marvel characters.

marvel-size-disribution

The Graph Distance Report shows the size of the network and length of the average path between nodes. The sample Marvel data indicates a graph diameter of 11 and an average path length of 4.45.

Filters allow you to select for various attributes and topologies.

Results/Discussion

My completed Gephi visualization can be downloaded at:

https://whysel.com/wp-content/uploads/2014/04/LIS658_Whysel_Gephi_Lab.gephi

Gephi is clearly a powerful analytical tool that requires some trial and error to use the functions properly. It is particularly important to have the data formatted properly before import and to make sure that you know the difference between a node table and an edge table. I had to re-import my data a few times before I got it right.

Also, different kinds of data may require a different layout. Once the data is imported it becomes a playground of possibilities. Any number of displays, analyses and filters can be applied to the resulting visualization.

The other thing that I noticed is that a large dataset can really slow down the performance of the tool, making rendering quite slow, especially when generating the initial layout and adjusting zoom levels.

As for the Marvel data, I was not surprised to find such a dense and interconnected graph. While I didn’t attempt to show node labels, it was clear that some groups were more connected to one another than others based on the patterns of the grouping and deepness of the hue.

Future Directions

The dataset I analyzed shows characters from the Marvel Universe and the series in which they appeared. It does not indicate the number of issues in each series the character appeared or whether the character was a major or minor player in the series. Some interesting directions one can take with the Marvel Universe dataset might be to apply weights to the relationships. For example, one could attempt to measure how many times within a series the character appeared, or how often one character interacted with another and apply those weights to the data in Gephi. The current visualization only indicates that the characters appear together. It would be interesting to figure out if Gephi would be able to measure the strength of the connection between characters in this way, but it would be quite an involved project!

Tableau Software – Joseph Stiglitz’s Economic Research

Tableau Software, developed at Stanford University, allows users to import data and create a number of visualizations by dragging and dropping components onto a panel. Users can create any number of visualizations, develop interactive dashboards and publish them onto Tableau Public, a platform that allows you to share your visualizations or embed them into your own website and presentations. We tested Tableau Software in LIS 658 Information Visualization at Pratt Institute. Below is a report of my findings.

Materials

The materials required for this lab included a computer, Tableau desktop software, and a dataset to work with. Tableau Software was already available on the desktop computer of the Pratt Institute classroom where we performed the lab. Since the Nobel Prizes were going to be announced this week, I was interested in submissions from Nobel economics laureate, Joseph Stiglitz, in Columbia University’s Academic Commons repository.

Dataset: https://whysel.com/wp-content/uploads/2014/04/Stiglitz-AC-Downloads.xlsx

Tableau Software: http://www.tableausoftware.com/

Data Wrangler: http://vis.stanford.edu/wrangler/


Deliverables

Downloads by Content Type
Total Downloads by Item
Item Change in Position Over Time
Most Popular Item by Month

Method

  1. Select the Data.
    The first step is to find a dataset to work with. This can be something you have on your computer or something that you find on the Internet. Make sure that it is in a format that Tableau will accept. The following formats are accepted:

    • Tableau Data Extract
    • Microsoft Access
    • Microsoft Excel
    • Text File
    • Import from Workbook

Note that Tableau requires that the data be formatted in a normalized manner so that each row contains only one piece of data. I used a program called Data Wrangler to edit the raw data into a format that is readable by Tableau.

  1. Connect to Data.
    To import data into Tableau, Click “Connect to Data.” Select the data format (I chose Excel). Then, select the workbook that you would like to import.
  2. Create a View.
    In the left column, you will see all of the data as identified by Tableau as Dimensions and Measures. Dimensions that are identified as text have an “abc” icon while dates have a calendar icon and geographic locations will have a globe icon. Dimensions can also be discrete numerical fields, like order numbers or zip codes. Measures are continuous numerical fields and are identified as numbers with the # symbol or as geographic data (latitude/longitude) with the globe icon.Make sure that the data format is identified properly. If not, for example, a date may be identified as a label rather than a numerical field, you may need to return to the dataset to edit the data. If you need to convert a discrete field to a continuous field, right click it in the Dimensions pane and select Number under Data Type, then right click again and select “Convert to Continuous.”
  3. Select fields to analyze.
    Drag a Dimension or Measure to the Columns “shelf” at the top right of the screen, and another Dimension or Measure to the Rows shelf. Notice that when you drag a discrete field to a view, it adds category headings, while a continuous field adds a scale.
  4. Choose a Mark Type.
    The Mark palette allows you to set the type of graph display. On Automatic, Tableau will select the graph type that best fits the data you selected. You can also use the Show Me button to opens a palette and allows you to select a Mark type for your visualization. Types of displays include line and bar charts, tables, maps, pie charts, circle or shape graphs, Gantt charts and other displays. This palette shows hints for the number of dimensions and measures to use for each kind of Mark type.
  5. Add Mark Properties to the data.
    The Marks palette also contains a set of functions that allow you to change properties of the data, such as the Color or Size of the display components, add Text or additional Detail.In the same palette, Tooltip allows you to Filter or remove a selection or view underlying data. Tooltip also allows you to indicate what to display when a user rolls their cursor over a datapoint on your display. You create these features by dragging a dimension onto the marks.
  6. Create a Dashboard.
    A Dashboard is a collection of views displayed on one sheet. To create a dashboard, select Dashboard | New Dashboard. From the left column, select a view to add to the new dashboard and drag it into place in the right pane.The layout is customizable, depending on where on the pane you drag each view. A gray area will indicate where you can drag a view. You can also select from the menu the items you would like to show on the dashboard, such as titles, legends and captions. Additional options in the left column allow you to change the dashboard size, add text, images or web pages, etc.Each time you add a new dashboard, it creates a new tab at the bottom of the screen. Dashboards and Views are noted by either a table icon (for Dashboards) or a spreadsheet icon (for Views).
  7. Save Your Visualizations.
    To save your workbook, click File | Save from the menu. You can also publish your workbook to Tableau Public by clicking Server | Publish Workbook. This will prompt you to log in to the website. If you do not already have an account, you can create one. Type a name for the workbook and click Save.
  8. Share Your Visualizations.
    Tableau offers a number of ways to share your visualizations. After saving a visualization, the preview panel offers a link to the view in Tableau Public or to embed the view into your web page. When you embed the view, you can also find share features at the lower left hand of the page by clicking on the icons for Facebook, Twitter, Email or Links.

Discussion

I created several views of Joseph Stiglitz’s work in Academic Commons. These views included visualizations of his work by content type, number of completed downloads and downloads per month over a twelve-month period:

  • Circle Graph of the Content Type showing the number of downloads for each Content Typestiglitz-circle-graph
  • Graph of individual Titles, showing the number of downloads, colored by Content Typestiglitz-content-type
  • Bar chart of downloads by Content Type for each monthstiglitz-bar-chart
  • Circle Chart showing each item and its position for each month (Showing the data for an individual item)stiglitz-article-circle-chart
  • Line Chart indicating the change in position of Stiglitz’s most popular item over time (most popular article selected to highlight spikes in downloads)stiglitz-article-line-chart

Discussion

It took some trial and error to learn how the various features of Tableau worked. I initially had some trouble importing the dates properly. I had a field that included the month and year, containing data for a full year from October 2012 to September 2013. Tableau read this data as a month and date. For example, “December 2012” was formatted as “Dec-12” which Tableau read as “December 12, 2013.”  Once I corrected the data and re-imported the spreadsheet, it displayed properly in Tableau.

It was helpful to learn the difference between a data dimension and an attribute. When I initially dragged the title and date to the Rows I ended up with a lot of small multiples. When I changed the Title to an attribute of the number of downloads, I was able to show the number of downloads for each title on a single chart. I had to play around with the attributes and filters to remove null values and get the data to display on a single chart instead of small multiples. I also had to edit the colors of the Content Types as they were not displaying uniformly from one Workbook to the next. I had earlier changed the order of the Content Types displayed in the legend, which may have caused the problem.

One of the results of my analyses indicated that some of the articles in Joseph Stiglitz’s repository were duplicate entries. I noticed that the URL field in one particularly popular article had an asterisk instead of a URL and examined to the data to discover that indeed there were two copies of the same record, deposited at different times. I thought it was interesting that the software read the data each of these records as a single title and aggregated the downloads for each month into a single data point, because it meant that the visualization was providing a more accurate view of the data than the raw spreadsheet file.

Limitations of Tableau Software include the fact that it only works with the Windows operating system. I have a Mac System at home so I was not able to download and work further with my visualization. Also the cost is somewhat prohibitive at $999 per user for the personal edition and $1,999 for a professional version. Tableau offers a hosted version, Tableau Online, which is offered by subscription at $500 per user per year. Aside from these limitations, Tableau Software seems to be virtually limitless in the ways one can visualize data.

Future Directions

Tableau includes many features and functions that I did not use or did not have time to explore in depth. For example you can add a number of interactive features to dashboards to allow users to change the way Views are displayed by adding Actions and Filters. It would be nice to be able to click on a Content Type and have it explode into the individual documents, or to click on a bar chart showing downloads in January so that a separate column chart breaking that month out by Content Type. While exploring the Help documents from home, I also discovered the Pages feature, which would be another useful way to present information in a live visualization. There are many more features worth exploring.

Going back to my original data source, I think that Tableau visualizations would provide valuable insights to the Academic Commons team at Columbia University Libraries. We are always looking for ways to drive traffic to the repository. I would like to learn how to add a link to the URL so that when a user clicks on an item and sees the URL in the attribute box, they can click the URL to view the item in Academic Commons. I tried to do this with the Tooltip feature, by entering the HTML code for a link, but it displayed the code in the popup box and did not link to the repository. This could be a good way to highlight interesting features and explore document usage within a collection of materials, such as subjects, authors and departments and drive traffic to the site.

There were definite spikes in usage of article “Equilibrium in Competitive Insurance Markets” that occurred I November 2012 and April 2013. It would be interesting to study what event triggered these spikes. An analysis of all 11,000 items by author or department would also be interesting to see which areas could use more outreach by the data collection team.

The Academic Commons repository manager was particularly interested in the results of my analysis of duplicate records. Originally she was planning to simply delete one and add the Views and Download totals to the remaining record. When I showed her the analysis of downloads over a twelve-month period, it became clear that her plan would disrupt the data on the historical download rate for that article over time. This helped her to reconsider her plan for dealing with duplicate entries and she is now going back to the developer to work on a plan that won’t alter historical data. A similar analysis on other frequent depositors to look for duplicates would be a good idea.

Google Refine: NYC Public Bathroom Map

Many data analytics projects start with a big mess, including nonstandard inputs, miscalculations, typos and other human errors. In addition, there are times when the way data is collected is not ideal for the way the analyst wishes to interpret it. An example might be when dollar amounts are entered in thousands when billions might be more appropriate figures to work with. Google Refine offers a relatively simple way to clean up data and perform transformations on up to thousands of records all at once. We reviewed Google Refine using NYC Open Data to see this in process.

Materials

The materials required for this lab included a computer, Google Refine desktop software, and a dataset to work with. Google Refine was already available on the desktop computer of the Pratt Institute classroom where we performed the lab Originally we were going to use a library file from iTunes, but we were unable to load the file to Google Refine, so we copied data from NYC Open Data portal instead.

Dataset:

Map of Bathrooms
https://data.cityofnewyork.us/Housing-Development/Map-of-Bathrooms/swqh-s9ee

New York City Open Data Portal
https://nycopendata.socrata.com/

It was also very helpful to have a copy of the Google Refine documentation:
https://github.com/OpenRefine/OpenRefine/wiki/Documentation-For-Users

Method

  1. Get the Data.The first step is to find a dataset to work with. This can be something you have on your computer or something that you find on the Internet. Make sure that it is in a format that Google Refine will accept.These formats currently include the following for Google Refine, version 2.0:
    • TSV, CSV, or values separated by a custom separator you specify
    • Excel (.xls, xlsx)
    • XML, RDF as XML
    • JSON
    • Google Spreadsheets
    • RDF N3 triples
  2. Import the Data.Google Refine offers a few ways to import data into the system, including uploading a file or copying it into a text field. The file upload function accepts a number of formats including Excel, CSV, RDF, XML, and Google Spreadsheets, among others. You can reference a dataset via its URL, copy and paste the dataset from the Clipboard or select a dataset from Google Data. When you have selected the file or copied the data, click Next.refine-import
  3. Review the Data.Did it import correctly? Did the data separate into columns as it should? Are the column headings showing up as headings or as a record row? If you use a spreadsheet, a delimited file like CSV or a structured file such as RDF or XML, it should have imported correctly. If not, Google Refine offers a set of tools that can help you define separators, such as commas or tabs or a custom field, or combine columns if they were separated incorrectly. It also allows you to set the rows that you want to use as the column headings, if these are not defined in the original file.refine-review
  4. Create Project.When you are satisfied that the data imported properly, click on the “Create Project” button at the top right of the screen.refine-save-project
  5. Clean the Data.When the data is separated into columns, look for additional problems. Do there appear to be misspellings or unconventional entries? Are there numerical figures that appear to be in a nonstandard format? Make a note of these problems so you can address each of them in turn.Google Refine offers a number of tools for editing and transforming data. You can edit cells individually within the spreadsheet. To edit a single cell, hover your cursor over the cell you would like to change and click “Edit.” This will open a small window with a box holding data that you can edit. It also allows you to set a data type and either apply the data just to that cell or to all identical cells. Click the “Apply” button to confirm the changes.You can also make changes by selecting Text Facets, which allows you to view cells within a column that share a common value and perform a search/replace function on all cells sharing that value at one time. To do this, click the dropdown arrow at the column header and select Facet | Text facet (or any of the other facets: numeric, timeline, scatterplot, or custom). Review the results for items that could be changed or combined. For example, if there is an entry for “Astoria Boulevard” and another for “Astoria Blvd,” you may wish to combine them as a single value, “Astoria Boulevard.” The “Cluster” button will reveal any datapoints that could be combined in this way.

    refine-facet

  6. You can also Transform data in a column by using a user-defined expression, which operates similarly to formulas in a spreadsheet. Google Refine Expression Language, or GREL, was designed to resemble Javascript. The documentation website is particularly helpful with performing transformations as it reviews the various expressions you can use to make changes to the data.refine-transform

    In my NYC Bathrooms file, I noticed that in the BUILDINGTY column that most of the data is entered in all caps, but the “Recreation Center” is in title case. I can change this by first selecting a text facet on this column, and then performing a transformation on the results. First click the dropdown arrow on the column heading and select “Text Facet.”

    refine-edit-cells

    This will open a window in the left column. Look for the item marked “Recreation Center.”

    refine-filter

    From the results, click the dropdown arrow on the column heading and select “Edit Cells” then “Transform.”

    refine-text-facet

    To change the value of the cells from “Recreation Center” to “RECREATION CENTER” simply type “RECREATION CENTER” (with the quotes) into the expression box. A preview below the expression box will show you if your changes are reflected properly.

    refine-custom-transform

Results/Discussion

I opened Google Refine and attempted to import the iTunes XML file to the system without success. I tried both the file import function and the copy text field but got errors. I turned to the NYC Open Data portal and found a simple CSV file of bathrooms in public parks, which I imported using the “This Computer” link and it worked.

Next, I reviewed the data for items that required cleaning. I found a number of bathrooms at Junior High School playgrounds whose records were labeled “Jhs” in the Description field. I decided I would try transforming the instances of “Jhs” to capitalized form, “JHS.” To do this, I found a transform expression that allowed me to replace the first four characters “Jhs“ to “JHS” successfully using the following expression:

“JHS ” + value.substring(3)

refine-custom-text-transform

There were a few glitches that required me to edit some stray cells individually. For example, one record contained the string “Jhs ” which was not in the first four characters. I did not have enough class time to figure out how to exclude this record. I edited the cell by moving the string to the front of the phrase and then performing the transformation. I had to make a note to myself to correct it to the original placement after performing the transformation. There may be an expression that allows you to transform a string without identifying its location.

The following image shows the “DESCRIPTIO” column with the transformed cells and all mentions of “JHS” in capital letters:

refine-facet

Future Directions

Most of the problems that I encountered while using Google Refine may be related to my beginner status with the program. Google Refine’s documentation offers extensive information about the ways you can sort, filter and transform data, and numerous examples of expressions that you can use to edit and transform multiple records at once. With patience, a user may find learning Google Refine’s tools saves time in the long run, particularly when working with large datasets.

Timeline JS – NYC Community Gardens

A timeline is a great way to display of a series of events and related information and tell a story around those events. Verite’s TimelineJS is a simple and useful tool for creating an attractive and easy to use timeline visualization. For my project, I created a timeline of events surrounding the history of farm and community gardens in New York City.

Materials

I started with a list of events created in Google Docs. This dataset includes the date of the event, a headline-style title, description and the URL for an image to illustrate the event, as well as a caption. Where there is a website with additional information about one of the gardens includes, I linked either a portion of the description or the image itself to the site. Most of the information comes from high quality sources such as the websites of the featured gardens, the New York City Department of Parks & Recreation and newspaper articles from the Chronicling America database. The New York Botanical Garden Mertz Digital Library was particularly useful, as were historical maps from the New York Public Library Map Division. I used to Verite TimelineJS to process and create the narrative visualization. Dataset: https://docs.google.com/spreadsheet/pub?key=0Ai4jVfIRGeOldExvazRNenliZDNVTDZuNFJ3eHRvZ1E&output=html

Method

I used Verite TimelineJS to demonstrate a narrative visualization of a series of events.  Since I had been working on a research project of New York City community gardens during the summer term, I decided to use the timeline software to illustrate the development of both formal and informal gardens in New York City, beginning with the creation of Central Park in the 1850s to modern farm gardens. TimelineJS offers a three-step process for creating a timeline. To use it, visit http://timeline.verite.co/, click on “Make a Timeline” from the top navigation and follow the steps:

  1. Step One: Create a new SpreadsheetThis step requires a couple of mini steps. First, to use the TimelineJS template, click on the bold “Template” link. This opens the template in a new browser window. Click on the “Use this template” button to create a copy in Google Drive (you may need to log into your Google Account or create a new one if you do not have one.)Click on the title “Copy of TimelineJS Template” to enter a new, descriptive name for your file.Now enter your event data. Notice that some columns are required fields. You can rollover the header cells to see if it is required and in some cases to see examples of the type of data that can be included. The Text and Media Caption fields will accept HTML coding if you want to add formatting or links, but it is not required.
  2. Step Two: Publish to the WebWhen you have entered your data, click on “File” in the Google Docs menu and then click “Publish to the Web.” In the popup window click “Start Publishing.” It may take a few moments to complete this action, depending on how many events you have entered.When the spreadsheet is published, a link to the completed timeline will appear in the box at the bottom of the popup window. Copy the link so you can use it in the next step.If you mark the checkbox next to “Automatically republish when changes are made” then the timeline will reflect any subsequent changes to the spreadsheet.
  3. Step Three: Copy/paste URL into the generatorPaste the Google Doc link into the box at Step 3. You can use the More Options dropdown to change the font. Click the Preview button to see what your timeline will look like. You can try different fonts from the More Options until you see one you like best. The Embed Code box will reveal a set of code that you can use to put into the web page where you want the timeline to appear.

Depending on the type of system you are using to host the timeline, additional customization may be necessary. A custom website or hosted WordPress is ideal. The <iframe> code won’t work on a free WordPress account, but a hosted account will allow you to download a plugin to include this content. Also, some additional customization may be desired, in the form of edits to your site’s CSS, if you need to comply to an overall style in the final output.

Results/Discussion

My completed timeline is located on my website at: https://whysel.com/garden-timeline.php Serving data via Google Spreadsheets is a good choice for Verite TimelineJS. Storing the data in the cloud allows immediate access and Google’s auto update simplifies the process of creating a timeline. When you publish data on Google Spreadsheet you can decide whether to allow changes to automatically be reflected in the published document, or deselect this option and Republish manually. I really liked this feature, because I didn’t have to worry about manually publishing after every small edit to the spreadsheet. One the other hand, if I want to make a more substantial change, such as adding a new event, I can instruct Google to stop auto-publishing until I have completed the new event record.

What I liked less about TimelineJS was the limited number of options for customizing the timeline. They give you a list of font pairings and the ability to change the height and width of the timeline, but to edit the timeline colors and format further, you need to know how to edit your sites’ CSS file. I wasn’t particularly happy with the font choices, as few of them are familiar, standard fonts, so I needed to preview each set to see what they would look like. I didn’t like many of them, either.

Also, the <iframe> based output means that certain content management systems, like a free WordPress site, can’t display the timeline because they don’t support <iframe>. The site I worked on over the summer is hosted at WordPress.com, so I was not able to include it in that project, which was disappointing.

[timeline src=”https://docs.google.com/spreadsheets/d/1oJVBK2QkT80IipCE93qhptzDbiCpOezxSTNMP6iOnHY/pubhtml” width=”900″ height=”600″ font=”Bevan-PotanoSans” maptype=”toner” lang=”en” ]

My New York City gardening story is heavily focused on the period from 1900 to 1920, which was a time period that I focused on during my summer research. TimelineJS makes this visually clear in that there is a thick grouping of events during those decades and a sparse listing of events after 1920. This may appear to suggest that not much was going on in NYC around community gardening and farming after that time. It also makes me curious about what kinds of events I could add to the timeline to fill in the story during those years. For example, when was key legislation written that encouraged the development of vacant properties into community uses? I found relevant laws, but would need to do further research to find out when and why they where established.

Alternatively, I could create a separate timeline discussing the events from the 1978 founding of Operation GreenThumb to the present, telling each individual story in a separate visualization. I could also use a timeline to focus in on the lifespan of a single plant, or broaden the narrative to a history of agrarian society at large. TimelineJS doesn’t tell you what you should put into your timeline and what to leave out. These are choices that the researcher needs to make to tell an interesting story or make a convincing argument. In the end, TimlineJS is one of many tools to create that narrative.

Update

At the time I wrote this report, I was not able to find a way to embed the timeline because WordPress free, hosted site would not display <iframe>. when I created this research post, I discovered that Knight Lab offers a plugin for Wordpress that allows you to embed <iframe> code. There are several plugins for embedding this type of code, but Knight Lab is a good one and it works fine in my site. You just need to be sure your site is hosted on yr own account rather than at WordPress.com. Visit www. for more information about hosting your own WordPress site.